Self-Watering Planters: DIY Containers to Combat Drought
Building Planter Boxes Has Never Been Easier
Reading Time: 6 minutes
What holds five gallons of soil, uses 80 percent less water and costs less than a dollar? Self-watering planters! DIY instructions are simple and most materials can be recycled.
Finding the right place to garden can be difficult. Sometimes all you have is a square foot of sun on an apartment deck. Then there’s the chance you might relocate, leaving your garden behind. It’s so tough it’s not even worth planting, right?
Wrong.
What if I told you how to build self-watering planters, DIY projects that mean you can take your gardens anywhere? And what if I told you it can cost less than a dollar?
Are you interested?
The Global Buckets Project
In 2010, two teenage boys became short-time celebrities. They had a mission to reduce malnutrition, two buckets at a time. Through videos and self-watering planter DIY instructions, they spread the word globally. Max and Grant Buster’s vision was, “Turning the rooftops and abandoned industrial wastelands of developing countries into mini-farms filled with green, growing vegetables.”
The concept was sound. Use discarded, recycled buckets. A PVC pipe. A cup with holes in it, perhaps leftover from a picnic. Fill the container with dirt and use it to grow food in deserts, on rooftops or in ghettos made of concrete and rebar. The cup wicks moisture up from the reservoir. Soil remains just wet enough for plants; as it dries out, more water is wicked up. A plastic barrier on top keeps every precious drop where it belongs.
Soon Max and Grant had reviews published with the United Nations’ Food and Agricultural Blog, India’s Hyderabad Sakshi newspaper, and on a famous website dedicated to sustainable living. After receiving reports that five-gallon buckets are valuable in some impoverished areas, they changed focus to growing in as many different discarded items that they could find.
Gifted teenagers with futures moving forward, Max and Grant soon stopped posting on the website but they left it up. New gardeners can search for Global Buckets and find the project, which doesn’t attempt to sell or advertise anything. The self-watering planters’ DIY instructions are still there.
Gardening on a Driveway
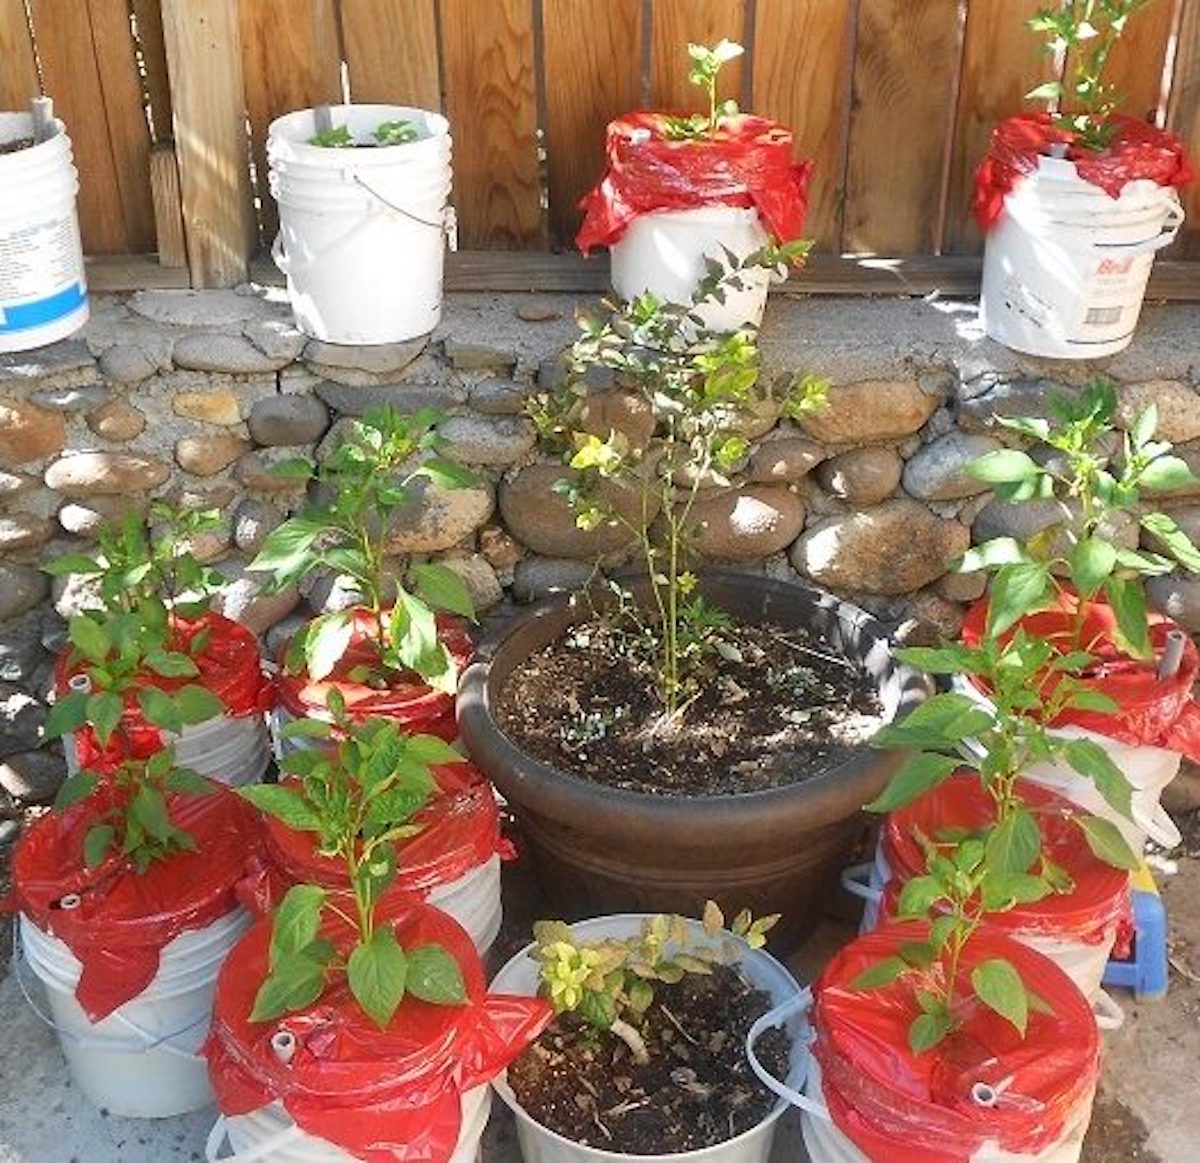
When I saw the first video on YouTube, I wasn’t trying to feed a family within a third-world country. I was trying to increase garden yield on my blacktop driveway. Really, I wanted to try growing cherry tomatoes in pots so the little ground space I had could go to carrots and onions.
You know that giddy excitement gardeners get when they hear of new techniques? I had that in December. A month before the top seed companies’ catalogs started falling through the mail slot. But I was determined, so I trekked from restaurant to supermarket deli, in search of discarded five-gallon buckets. Then someone told me that my local whole-groceries supermarket left their buckets beside the coffee bar so shoppers could bring them home for upcycling. Whenever I was near that store, I stopped in. One bucket or ten sat there; I took them all.
By February, I had enough buckets to start the project. I also had organic purple potatoes from the same whole-groceries store. With weather fluctuations from 70°F down to 15 within the same month, I knew it was way too early to plant those sprouting potatoes outside. But the buckets had handles. And growing potatoes in a bag or bucket would work if I brought them in during a cold night, right?
Well … it worked. On snowy days I laid plant lights across the tops of the buckets. When temperatures rose above 40°F, I carried the budding plants outside, bucket and all, and let the ultraviolet light shine through the white plastic. The potatoes flourished. As they grew, I added more potting soil. And I harvested my first potatoes in June, just in time to start a second crop.
By late May, I’d collected enough buckets to try growing lettuce in containers as well as eggplant, squash, tomatoes, etc. Pretty much everything but corn, though I was tempted to do that as well. I knew better. I’d need more buckets to get a successful corn crop.
Potatoes and tomatoes were the most successful. Eggplant and peppers did quite well. Squash weren’t as productive as in the ground, but I did get good amounts of zucchini. During May and June, I filled the lower reservoir once a week. July and August, when temperatures soared and plants grew, I filled buckets each morning with a funnel and a hose set to trickle. The only detriment the five-gallon buckets delivered was in August when my indeterminate tomatoes got rootbound. They still grew and produced but they were obviously stressed. Self-watering planters, DIY or otherwise, work best when root space is accounted for.

Self-Watering Planters: DIY Instructions
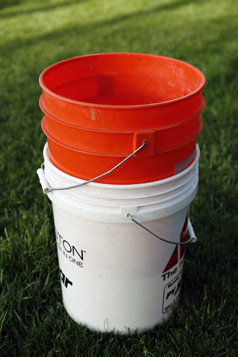
First, find two matching buckets. That means you cannot set a square bucket within a round one or a taller, thinner bucket within a shorter, rounder container. Both buckets must be the same dimensions to allow a reservoir in the bottom and avoid evaporation.
Now you need a piece of pipe that reaches from the bottom of one bucket to an inch above the top of the second when the buckets are stacked one inside another. PVC pipe works but I found plastic electrical conduit was cheaper per foot.
Next, find plastic or Styrofoam cups, one per pair of buckets. They can be old and a little cracked. Just make sure they’re not too mangled.
And finally, you need potting soil. Local dirt won’t work, especially if it has any clay content because it will compact together and pull away from the sides. The soil might be the highest cost for this project. And it’s fine to use old or cheap soil if you also use fertilizer.
Set the lower bucket aside as you cut a hole in the upper one, large enough for the cup to insert part way through. The goal is to allow the cup to hang down from the top to the bottom bucket without having gaps on the sides that dirt can fall through. Now drill little drainage holes in the bottom of that upper bucket, around the larger cup hole. Finally, drill a hole in the sidewall of the same bucket, just large enough for the conduit to fit through.
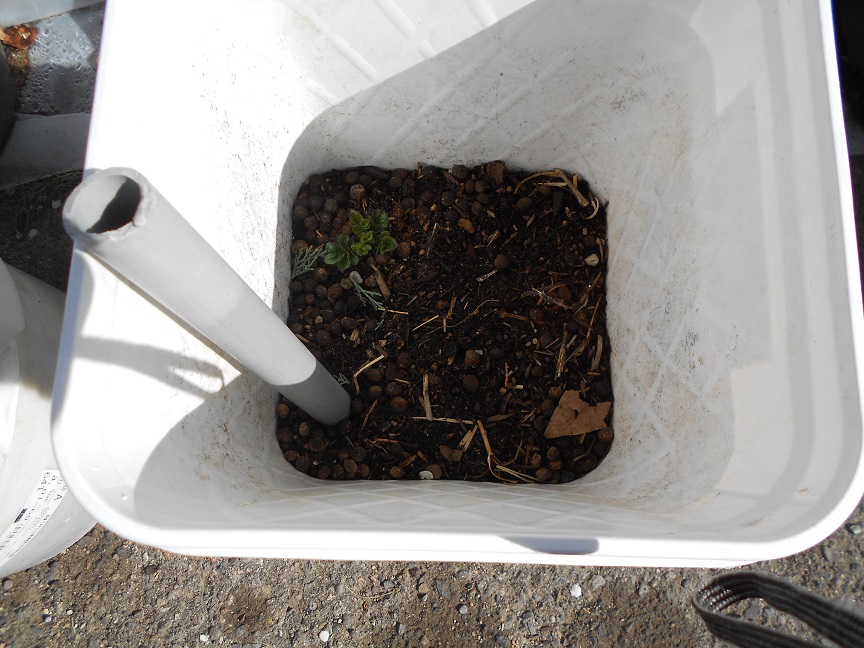
Stack the two buckets. You can now see how the bottom acts as the reservoir. Poke a few slits or holes in the cup then settle it into the center hole.
Cut a notch in the bottom of the plastic conduit. This allows water to flow into the reservoir instead of clogging up as the pipe rests against the bottom of the bucket. Then insert the pipe through the hole near the sidewall until it rests against the bottom of the bucket.
Hold the stacked buckets to the light and note where the bottom of the upper bucket extends down. Mark just under that. Now drill four of five little holes around the circumference of the lower bucket. This makes overflow holes which allow excess water to drain out instead of flooding the soil. Though that line can be easy to see now, it’s more difficult when buckets are filled with soil and water, sitting out of direct light. Overfilling and drowning roots is easy without overflow holes.
Now fill the setup with potting soil. Transplant tomatoes or peppers as you normally would within a garden, sprinkling water from the top to avoid transplant shock. Spread a ring of fertilizer around the outside perimeter of the soil, if desired. To conserve the most water, cut a plastic garbage bag into a piece large enough to cover the top of the bucket. Cut a slit so you can fit it around the plant’s stem. Then secure the plastic to the bucket’s rim with string or tape. This keeps any moisture from evaporating through the potting soil.
Fill the reservoir through the pipe or conduit until it drips out of the overflow holes. It won’t take much. A couple quarts at the most.
If you’re planting seeds, sow them as directed on the package. Water from the top until seeds sprout and plants are a few inches tall. Then mulch or use plastic to avoid evaporation. Continue watering through the pipe.
Planting Potatoes
Modifying the buckets for potatoes is easy. Simply fill it with only six inches of dirt at first. Plant two potato chunks, with two eyes apiece in that six inches. Keep soil moist until leaves emerge. When the foliage is at least six inches high, carefully add dirt, filling in the bucket until only about two inches of leaves show. Let it grow another six inches and fill again. Keep doing this until the bucket is all the way full. Now water with moderation, keeping the soil moist but not wet, until the foliage dies back in a few months. Then empty all the soil into a large container like a wheelbarrow so you can use it next year and search through until you find all the potatoes.
If you’re short on soil, you can mix it half and half with chopped straw when growing potatoes. It needs the nutrients at the bottom but it’s not as necessary higher in the bucket.
Have you tried self-watering planters? DIY or store-bought? Share your experiences in the comments below.


